


In an era where sustainability and health are at the forefront of our minds, making your own natural soap at home is not just a craft—it's a statement. It's about taking control of what goes on your skin and into the environment. For beginners eager to embark on this green journey, here's a comprehensive step-by-step guide to creating your first batch of natural soap, focusing on the importance of non-toxic ingredients.
Why Make Your Own Soap?

Before we dive into the "how," let's talk about the "why." Commercial soaps often contain a cocktail of chemicals and synthetic fragrances that can be harsh on the skin and detrimental to the environment. By making your own soap, you choose every ingredient, ensuring they're natural, non-toxic, and eco-friendly.
What You'll Need:
Ingredients:
- Base oils: Olive oil, coconut oil, and shea butter are great for beginners.
- Lye (Sodium Hydroxide): Necessary for the soap-making process, but handle with care!
- Distilled water: Acts as a solvent for the lye.
- Essential oils (optional): For natural fragrance.
- Herbs or botanicals (optional): Like lavender buds or oatmeal for exfoliation and texture.
Equipment:
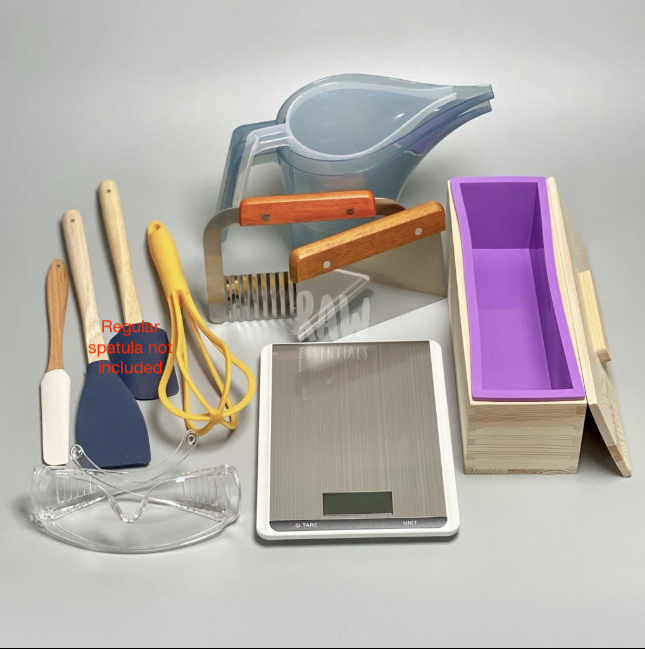
- Safety gear: Gloves and goggles
- Digital scale
- Two thermometers
- Immersion blender
- Soap mold
- Stainless steel or glass bowls
- Spatula
Step-by-Step Guide:
1. Prepare Your Workspace:
Soap making requires precision and safety. Cover your work area with newspaper, don your gloves and goggles, and ensure no pets or children are around.
2. Measure Your Ingredients:
Using your digital scale, accurately measure the oils, water, and lye. Precision is key for a successful chemical reaction.
3. Mix the Lye Solution:
Slowly add the lye to the distilled water (never the other way around) in a well-ventilated area or outside. This will heat up quickly and release fumes, so be cautious and avoid inhaling. Let it cool to around 100°F-110°F.
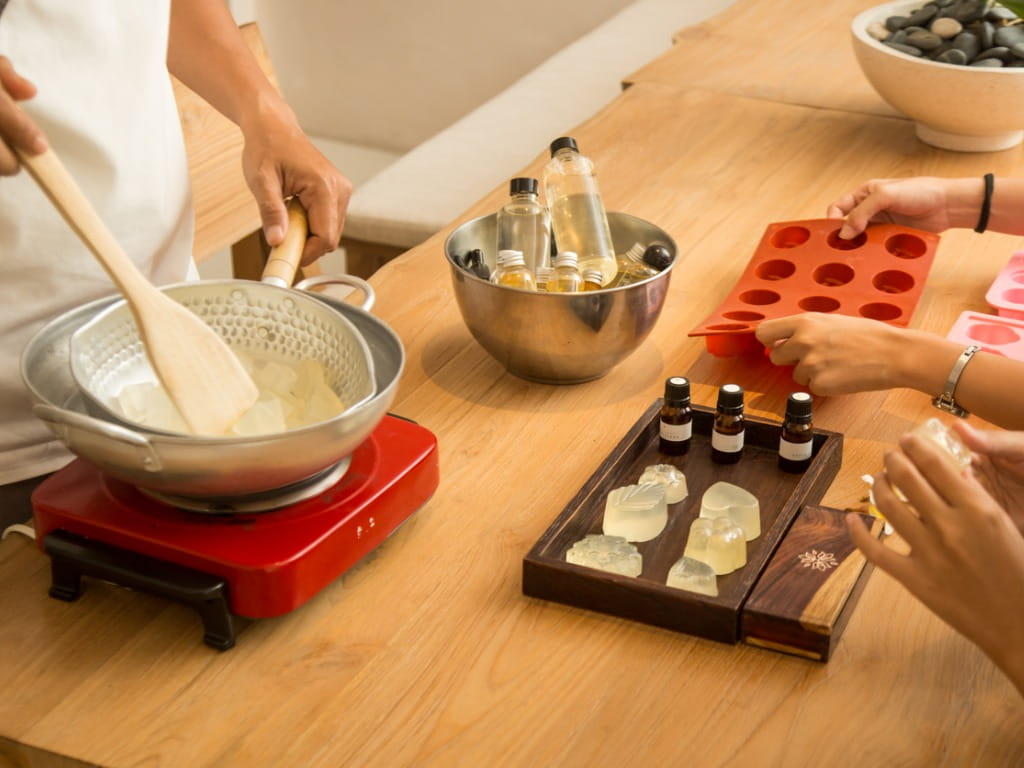
4. Heat Your Oils:
Gently heat your solid oils (coconut oil, shea butter) until melted, then add your liquid oils (olive oil). Bring the mixture to the same temperature as your lye solution.
5. Combine Lye Solution and Oils:
Once both the lye solution and oils are approximately the same temperature, slowly pour the lye solution into the oils while blending with the immersion blender. Blend until the mixture reaches "trace," which means it's emulsified and leaves a trace when drizzled on top.
6. Add Extras:
Now's the time to add any essential oils, herbs, or botanicals for fragrance and texture. Stir these in by hand.
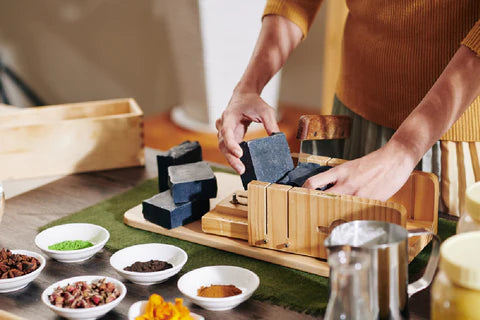
7. Pour Into Molds:
Carefully pour your soap mixture into the molds. Tap the molds gently on the counter to remove any air bubbles.
8. Cure:
Cover the molds with plastic wrap and wrap them in towels for insulation. After 24 hours, unmold your soaps and set them aside to cure on a rack for 4-6 weeks. This allows the water to evaporate, resulting in a harder, longer-lasting bar.
Safety Tips:
- Always add lye to water, not the other way around, to prevent a violent reaction.
- Work in a well-ventilated area and wear protective gear to avoid lye burns.
- Never use aluminum utensils or containers as lye reacts with aluminum.
Embrace the Process:
Making your own soap can be incredibly rewarding. Not only does it allow you to customize your ingredients, but it also gives you peace of mind knowing exactly what's going on your skin and down the drain. Embrace the process, experiment with different scents and additives, and enjoy the fruits of your labor.
Crafting your own natural soap is more than a hobby; it's a step towards a more sustainable and mindful lifestyle. So, gather your ingredients, unleash your creativity, and start your soap-making adventure today!
Not interested in making them? We make thousands of MamaSuds Bar Soaps fresh every week!
Leave a comment